# Coding with Karthik: Turing Machine in C
Date: 2024-06-28
Tags: Programming, C Programming Language
### What is a Turing Machine?
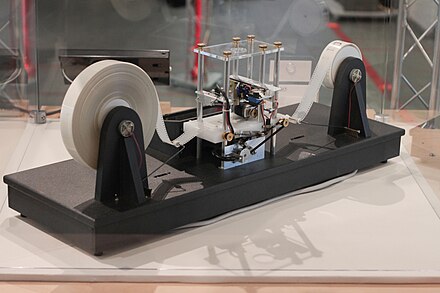
Image from Wikipedia
> "We can only see a short distance ahead, but we can see plenty there that needs to be done."
>
> -- Alan Turing.
A Turing machine is a theoretical model of computation introduced by the British mathematician and logician Alan Turing in 1936 -- *way* before there was anything like the computers of today. It is used to define the limits of what can be computed and to understand the nature of algorithmic processes. The Turing Machine is comprised of the following:
1. Tape: An infinite strip divided into cells, each capable of holding a symbol from a finite alphabet. The tape serves as the machine's memory.
2. Head: A read-write head that can move left or right along the tape and read or write symbols on the tape.
3. State Register: A register that holds the state of the Turing machine. There is a finite set of states, including a designated start state and one or more halting states. (This post will explain more about this)
4. Transition Function: A set of rules that, given the current state and the symbol being read by the head, dictate the following:
* The symbol to write on the tape (which may be the same or different from the symbol read).
* The direction to move the head (left or right).
* The next state of the machine.
> Note: The Turing Machine is an abstract concept -- we do not indeed have infinite memory. Therefore, we will pretend in this implementation that 20 memory cells will do.
{: .prompt-info }
> Want to learn more about the implications of the Turing Machine? Learn about [Turing completeness](https://en.wikipedia.org/wiki/Turing_completeness)
{: .prompt-tip }
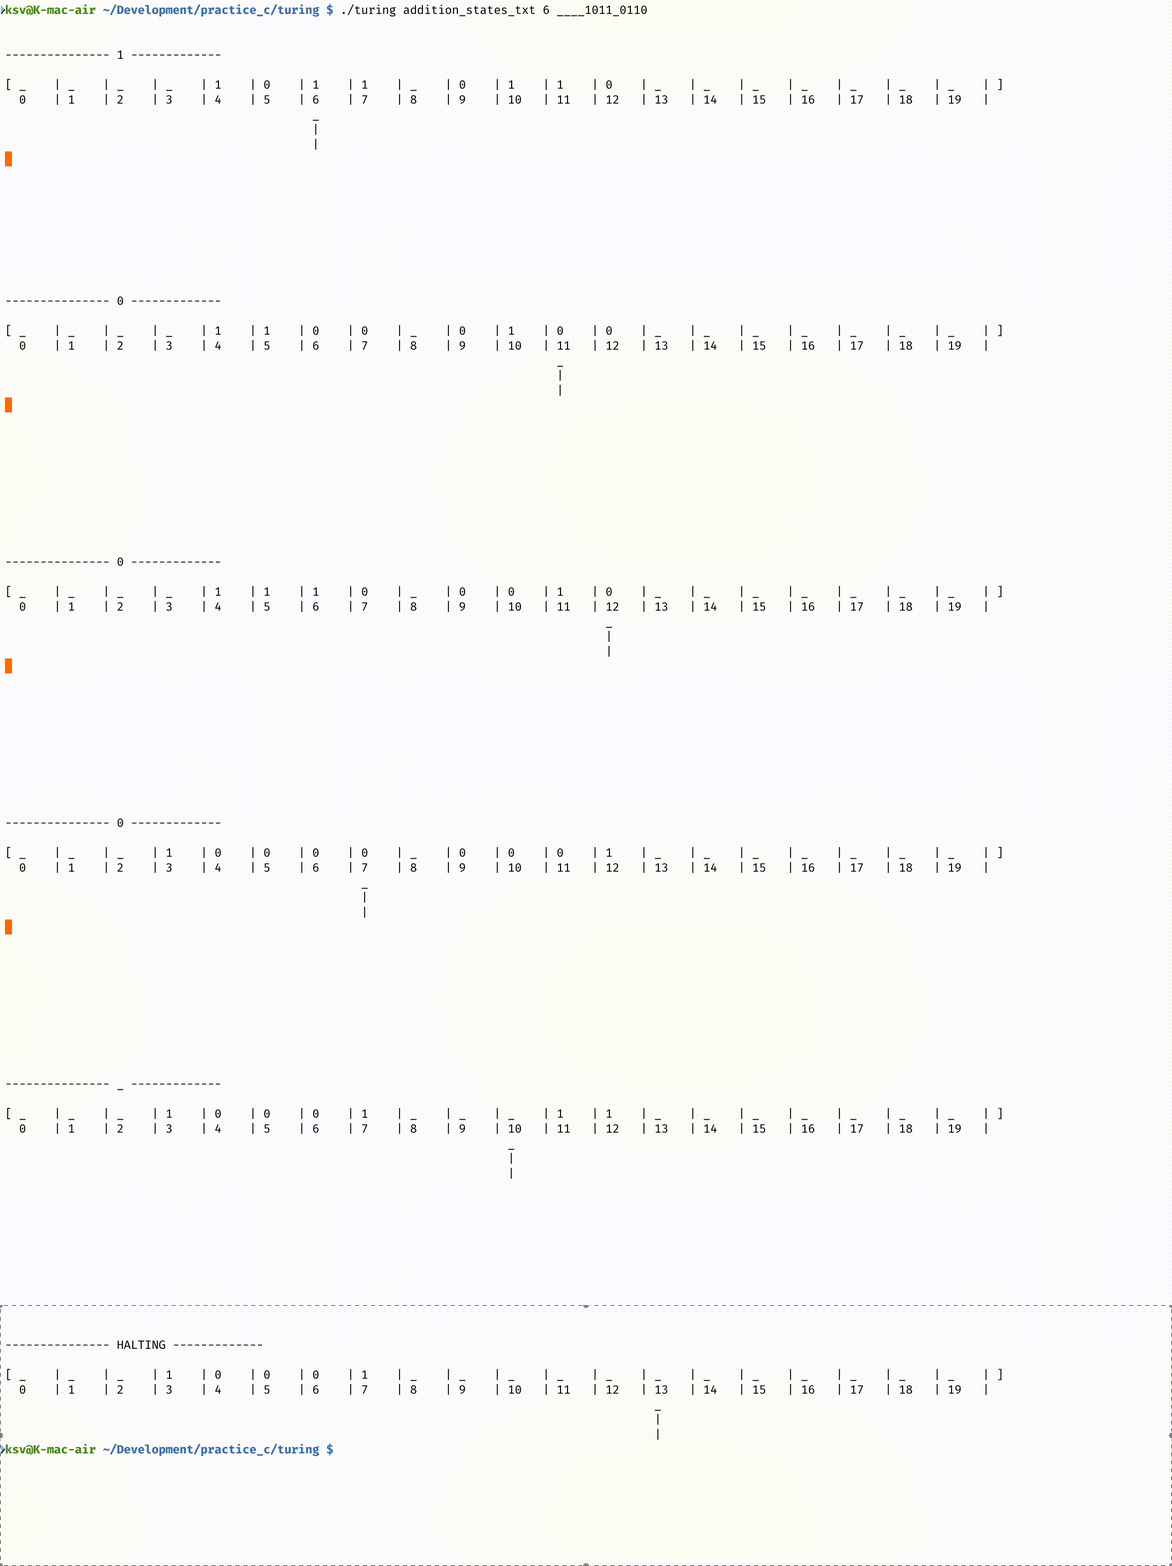{:.light}
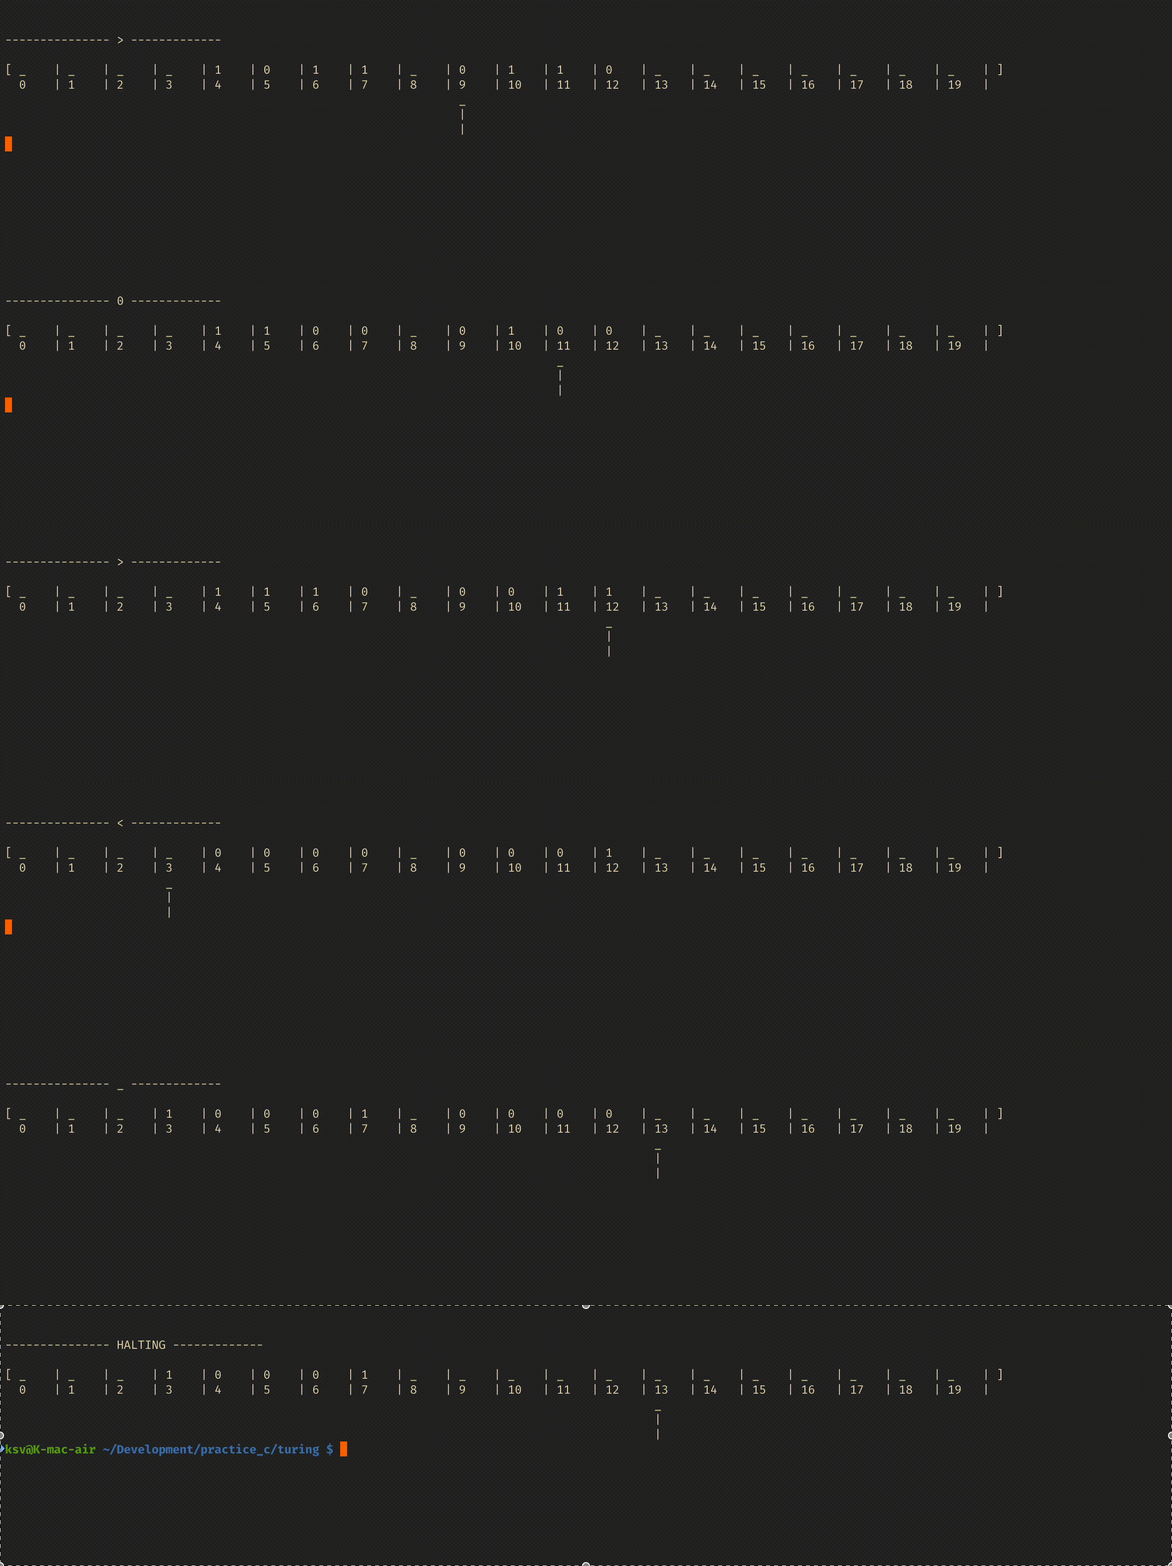{:.dark}
What we will be making in this blog post
### Credit
[This YouTube Video](https://www.youtube.com/watch?v=QO6nYR6dr8Y) was very instrumental in helping me write this code. While the video implements the Turing Machine in C++ and has a GUI rather than the terminal-based interface in this blog post, a lot of the schematics of the implementation of the Turing Machine in this blog post came from the video. Find the code accompanying the video [here](https://github.com/tucna/TuringMachine)
### Terminal Display (`machine.c`)
We will first create the program that emulates the movement and actions of the Turing Machine (**implementing that tape and head**). This program allows a visual representation of the Turing Machine to be animated onto the terminal, along with being able to interpret instructions to move the Turing Machine and manipulate the memory.
#### `print_mem`
The function below, given the memory array and the location of the current pointer, pretty prints it out as a visualization of a Turing Machine. The top row contains the values stored in the different memory locations. The row below are the indices/addresses of those memory locations. Finally, there is a marking below a certain memory location, denoting where the head or `current_pointer` is. The specific instruction run at that timestep is also printed on the top (in this case `>`, as seen in the example below the code).
```c
void print_mem(char *array, int size, int current_pointer) {
// print values
printf("[ ");
for (int i = 0; i < size; i++) {
printf("%-4c | ", array[i]);
}
printf("]\n");
// print indices beneath
printf(" ");
for (int i = 0; i < size; i++) {
printf("%-4d | ", i);
}
printf("\n");
// print arrow showing where current pointer is
// arrow tip
printf(" ");
for (int i = 0; i < current_pointer; i++) {
printf("%-4s ", " ");
}
printf("%-4s", "_");
// arrow stem
printf("\n ");
for (int i = 0; i < current_pointer; i++) {
printf("%-4s ", " ");
}
printf("%-4s", "|");
printf("\n ");
for (int i = 0; i < current_pointer; i++) {
printf("%-4s ", " ");
}
printf("%-4s", "|");
printf("\n");
}
```
{:.light}
{:.dark}
Visualization of the Turing Machine
#### `delay_and_flush`
Rather than having the program print the time step visualization one right below the previous one, I added a function that flushes/clears everything on the screen before displaying the next time step. Additionally, I added a delay between each timestep for better visualization. Since the sleep function varies for Unix-like and Windows operating systems, you can use `#ifdef,` which the preprocessor (the program that edits the C code before handing it to the compiler) uses to decide whether to use the `Sleep` function (for Windows) or `usleep` (for Unix and related OS). This idea was from this [StackOverflow post](https://stackoverflow.com/questions/14818084/what-is-the-proper-include-for-the-function-sleep). The `DELAY` symbol is also handled by the preprocessor (as set by the `#define` line)
```c
void delay_and_flush() {
// from
// https://stackoverflow.com/questions/14818084/what-is-the-proper-include-for-the-function-sleep
#ifdef _WIN32
Sleep(DELAY);
#else
usleep(DELAY * 1000);
#endif
// clear screen
printf("\e[1;1H\e[2J");
}
```
At the top of the file, I had to add the following:
```c
#define DELAY 100
#include
#include
#ifdef _WIN32
#include
#else
#include
#endif
```
#### `run_machine`
Finally, we have the function that converts instructions into changes to the memory and the movement of the head itself. The instruction set is explicitly stated in the code below (and instructions are passed through the `input` parameter). The function `run_machine` has the `current_pointer` passed in by reference as it has to be able to change the value of the variable and have such change be reflected outside of the function scope. The function also makes changes to the `array` parameter. Since the `array` variable by nature is a pointer to the first element of the array, there is no need to point to the pointer (I made that mistake and was debugging a bus error for a couple hours :D )!
reference
```c
void run_machine(char *array, int array_size, int *current_pointer, char *input,
int input_size) {
for (int i = 0; i < input_size; i++) {
if (*current_pointer < 0) {
printf("Current pointer negative: %d\n", *current_pointer);
return;
}
switch (input[i]) {
case '>':
(*current_pointer)++;
break;
case '<':
(*current_pointer)--;
break;
case '0':
array[*current_pointer] = '0';
break;
case '1':
array[*current_pointer] = '1';
break;
case '_':
array[*current_pointer] = '_';
break;
case 'H': // halt
printf("\n\n--------------- HALTING -------------\n\n");
print_mem(array, array_size, *current_pointer);
return;
break;
case '\0': // empty, so do not print anything
case ' ':
case '\t':
case '\n':
continue;
}
printf("\n\n--------------- %c -------------\n\n", input[i]);
print_mem(array, array_size, *current_pointer);
delay_and_flush();
}
}
```
### States (`turing.c`)
Now that we got a program that, given instructions like "`>>0<1`", will emulate a Turing Machine moving around and writing symbols on a piece of tape, we can now move on to programming rules or states of this machine that will decide what instructions to carry out (**state register and transition function**).
{:.light width="500"}
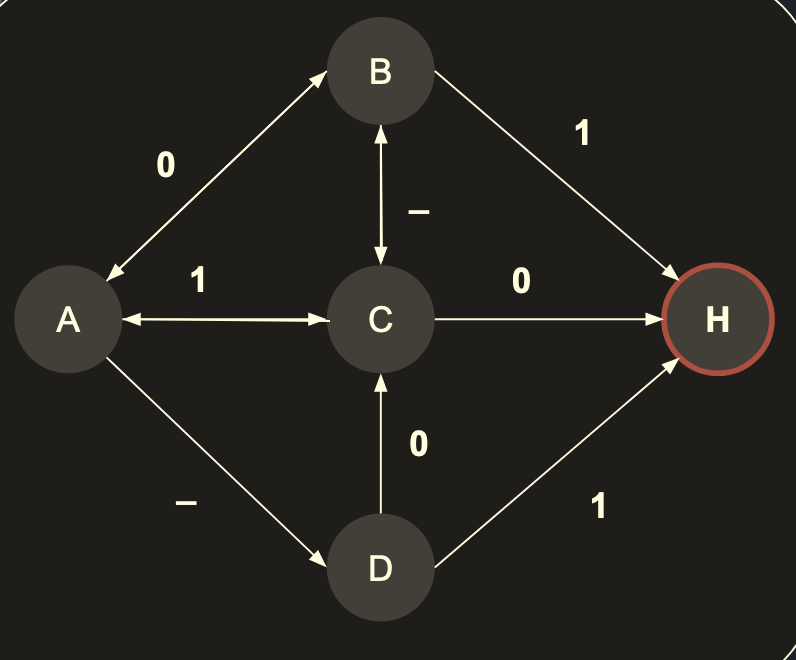{:.dark width="500"}
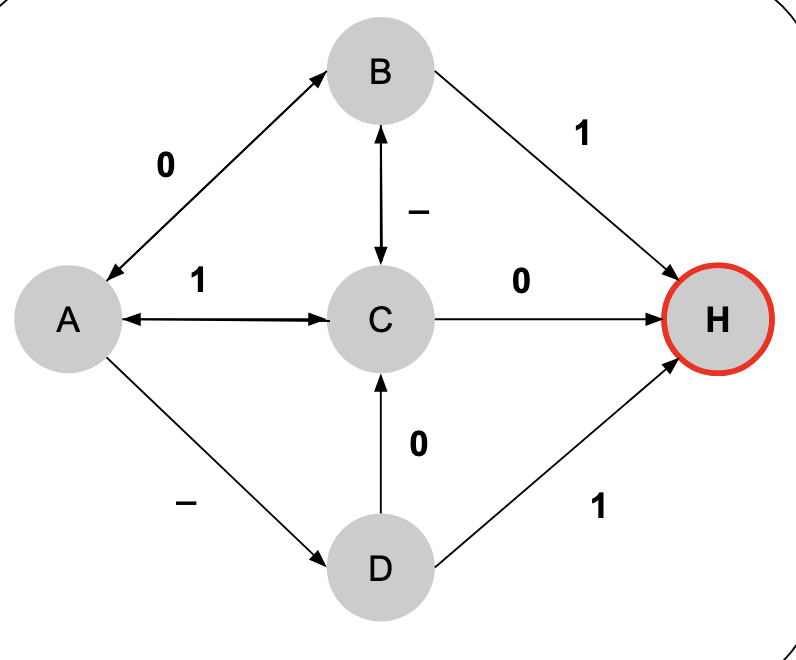
Sample state diagram
Above is a **state diagram**. At any point in time the Turing Machine will be in a certain **state** (see the circles labels "A", "B", "C" etc.). Depending on the value of memory the Turing Machine head is reading, the Turing Machine and then transition to the next state depending on the value of memory under its head (see the arrows connecting the different states in the diagram above). Before transitioning to a different state, the Turing Machine will perform an action (can be writing to the memory section under its head and moving one step to the left or tight). The state called "H" is the **"Halt state"**, which stops the machine. The halt state itself is another rabbit hole (check out the [Halting problem](https://www.youtube.com/watch?v=macM_MtS_w4))!
> Note: In the code I wrote, I wrote the halt state as an **action** the Turing Machine performs rather than a state in of itself. The functionality doesn't change regardless.
{: .prompt-info }
> Fun Fact: State diagrams like the one shown above are great for visualizing Regular Expressions. Learn more about that [here](https://www.categories.acsl.org/wiki/index.php?title=FSAs_and_Regular_Expressions).
{: .prompt-tip }
This is the fundamental idea: the Turing machine needs to know
1. the current state
2. current memory value
to be able to carry out an action and move on to the next state.
#### Structs, `search`, and `state_info_to_instruction`
There are no objects in C, but there are "structs". I defined two structs in my program. The struct named `state` encapsulates all state information (instead of letters, we are using numbers for identifying states), and the struct named `instruction` encapsulates what the Turing Machine should do: perform an action determined by the machine instruction -- which is just the write-value combined with the move value -- and then move to the next state.
The `search` function (yes, it is a linear search... I don't know how to code a hashmap in C yet...) gives a full state structure given the
1. the current state
2. current memory value.
The `state_info_to_instruction` function uses this `search` function to give a `instruction` structure based on these two pieces of information. Note that both of these functions do not return anything, and rather modify the last parameter (passed by reference) given to them.
These structs and functions together create the states and transition function.
```c
typedef struct state {
int state_number; // just in id
char mem_value; // the value in current memory location that it must have
int next_state;
char write_value; // '0', '1', or '_'
char move; // move left = '<' and move right = '>'; 'H' for halt.
} state;
typedef struct instruction {
char machine_instruction[3]; // last is null
int next_state;
} instruction;
void search(int curr_state_number, char curr_mem_value, state *state_list,
int state_list_len, state *match) {
for (int i = 0; i < state_list_len; i++) {
state s = state_list[i];
if (s.state_number == curr_state_number && s.mem_value == curr_mem_value) {
match->state_number = s.state_number;
match->mem_value = s.mem_value;
match->next_state = s.next_state;
match->write_value = s.write_value;
match->move = s.move;
return;
}
}
// if couldn't find state, just exit.
printf("Couldn't find state with state number %d and mem value of %c",
curr_state_number, curr_mem_value);
exit(1);
}
void state_info_to_instruction(int state_number, char state_mem_value,
state *state_list, int state_list_len,
instruction *res) {
state match;
search(state_number, state_mem_value, state_list, state_list_len, &match);
res->next_state = match.next_state;
res->machine_instruction[0] = match.write_value;
res->machine_instruction[1] = match.move;
res->machine_instruction[2] = '\0';
}
```
#### File input
The states are provided to the program by inputting a file. Below is the code that does this:
```c
/* file format is as follows:
* first line is number of states.
* every line after that is a single string, where the
* 1st character: state number
* 2nd character: memory value of the state
* 3rd character: next state number
* 4th character: write value
* 5th character: which way to move (or Halt)
*/
state *get_states_from_file(char *filename, int num_lines) {
FILE *pfile = fopen(filename, "r");
if (pfile == NULL) {
printf("No file %s", filename);
exit(1);
}
state *states = malloc(num_lines * sizeof(state));
char buf[MAX_LINE_LENGTH];
for (int count = 0; count < num_lines; count++) {
if (fgets(buf, MAX_LINE_LENGTH, pfile) != NULL) {
states[count].state_number = buf[0] - '0'; // convert char to integer
states[count].mem_value = buf[1];
states[count].next_state = buf[2] - '0';
states[count].write_value = buf[3];
states[count].move = buf[4];
}
}
return states;
}
int get_file_len(char *filename) {
FILE *pfile = fopen(filename, "r");
if (pfile == NULL) {
printf("No file %s", filename);
exit(1);
}
int lines = 0;
while (!feof(pfile)) {
int ch = fgetc(pfile);
if (ch == '\n') {
lines++;
}
}
return lines;
}
```
#### `main`
Finally, here is the `main` function, which puts this all together:
```c
int main(int argc, char *argv[]) {
const int num_states = get_file_len(argv[1]);
state* states = get_states_from_file(argv[1], num_states);
// Set up machine
int machine_arr_size = 20;
char *machine_array = malloc(machine_arr_size * sizeof(char));
memset(machine_array, '_', machine_arr_size);
// write initial memory
if (argc >= 4) {
for (int i = 0; i < strlen(argv[3]) && i < MAX_INPUT_LIMIT; i++) {
machine_array[i] = argv[3][i];
}
}
// initial state
int curr_state_number = 0;
int current_pointer = atoi(argv[2]);
instruction ins;
state_info_to_instruction(curr_state_number, machine_array[current_pointer],
states, num_states, &ins);
while (true) { // doing this since even if halt, we want to write first
run_machine(machine_array, machine_arr_size, ¤t_pointer,
ins.machine_instruction, 2); // instruction length always 2
if (ins.machine_instruction[1] == 'H') {
break;
}
state_info_to_instruction(curr_state_number, machine_array[current_pointer],
states, num_states, &ins);
curr_state_number = ins.next_state;
}
free(states);
free(machine_array);
return 0;
}
```
### Full code
Download the complete code [here](/assets/files/turing.zip)!
> Remember to run `make` to compile the source code!
{: .prompt-warning}
### Demo
Using the states provided in this [YouTube video](https://www.youtube.com/watch?v=QO6nYR6dr8Y&), I loaded an addition program into the Turing Machine. After compiling, just run
```bash
./turing addition_states_txt 6 ____1011_0110
```
to have the Turing Machine add the binary numbers `1011` and `0110`.
In general, the usage is:
```bash
./turing [INPUT STATE FILE] [STARTING HEAD LOCATION] [INITIAL MEMORY (optional)]
```
**Check out the gif below!**
{:.light}
{:.dark}